
 eaton-bussmann-series-photovoltaic-fuses-catalogue-ca135004en.pdf  | [Eaton Bussmann PV Fuses] | 0 kB |
How to Check Whether Photovoltaic Fuses Are Abnormal? 7 Warning Signs You Should Know
Photovoltaic (PV) fuses are essential safety components in solar power systems. They protect solar panels, electrical circuits, inverters, and other equipment against overcurrent, short circuits, and potential electrical damage. However, like other electrical components, photovoltaic fuses can deteriorate or develop faults over time.
An abnormal photovoltaic fuse may affect solar power generation, reduce system efficiency, or even create serious safety risks. Therefore, regular inspection and maintenance are essential to ensure the reliable operation of a solar PV system.
But how can you determine whether a photovoltaic fuse is abnormal? What warning signs should you look for, and how can you check its operating condition?
In this article, we explain seven important signs of photovoltaic fuse abnormalities and provide practical inspection methods to help identify potential problems before they develop into major failures.
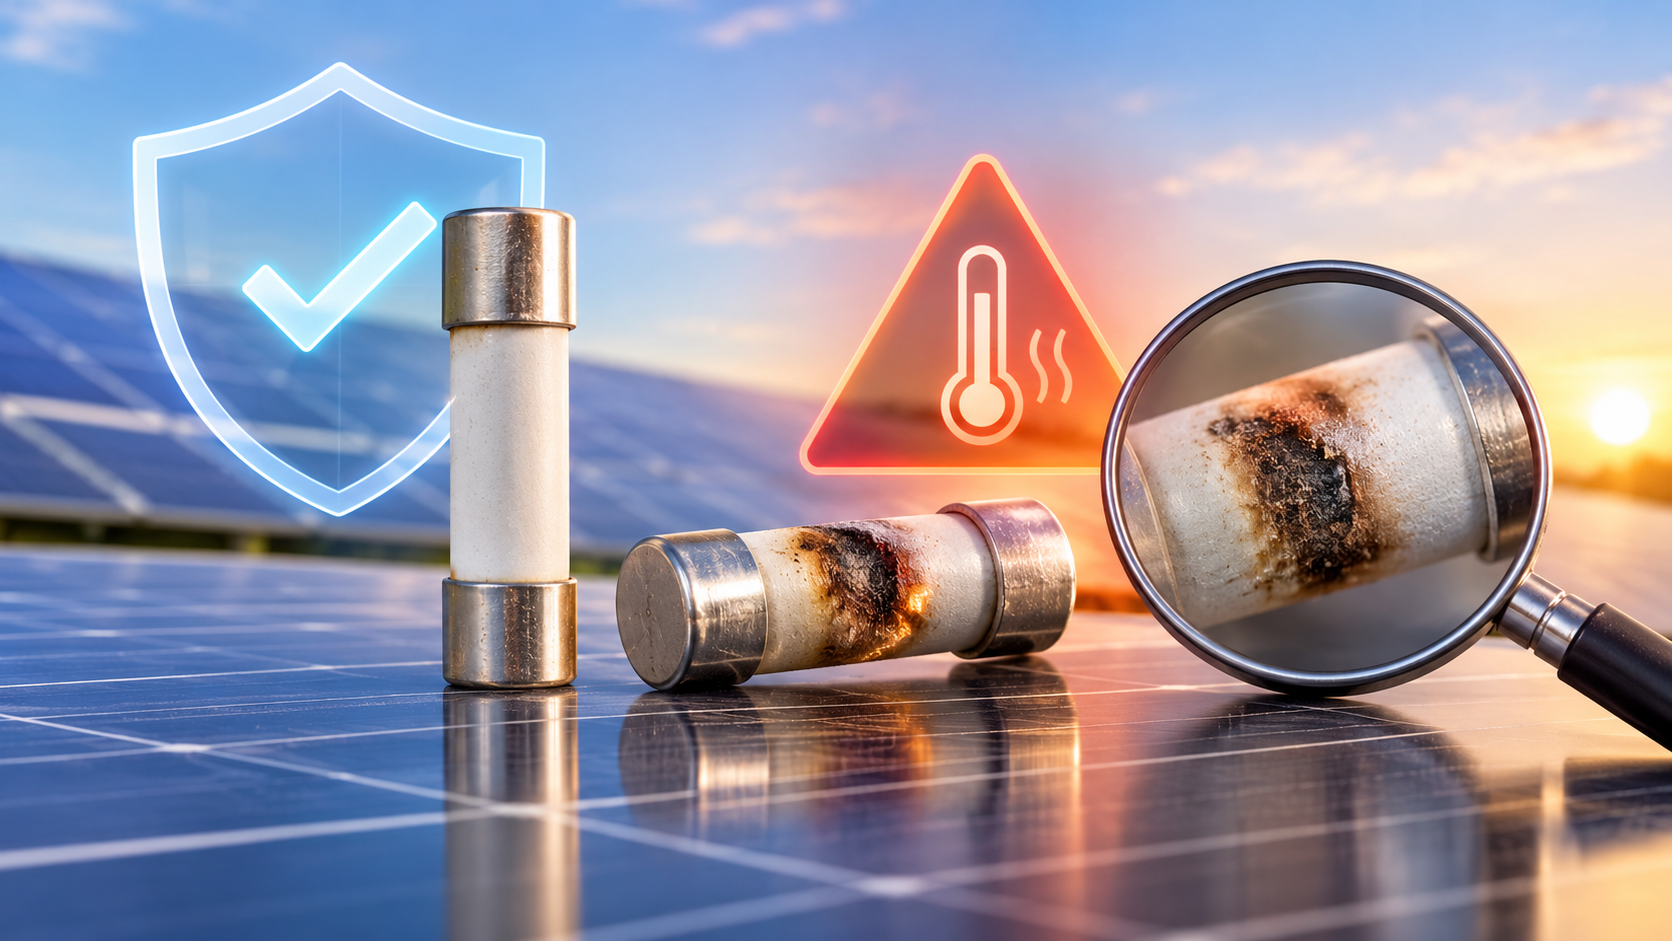
1. Check the Photovoltaic Fuse for Physical Damage
Visual inspection is one of the simplest ways to identify an abnormal photovoltaic fuse.
During routine maintenance, carefully examine the fuse body, metal contacts, and surrounding fuse holder. A healthy fuse should have an intact housing and clean, undamaged electrical connections.
Pay particular attention to the following warning signs:
-
Cracks or fractures in the fuse housing.
-
Broken or deformed insulating components.
-
Corrosion or oxidation on metal terminals.
-
Discolouration or deformation of the fuse body.
-
Loose or damaged protective covers.
-
Signs of moisture, dust, or foreign material entering the fuse assembly.
Physical damage can compromise the insulation and electrical performance of a photovoltaic fuse. Moisture and corrosion may also increase contact resistance, potentially causing overheating or electrical failure.
If any visible damage is discovered, the affected component should be assessed by a qualified technician and replaced if necessary.
2. Check for Abnormal Temperature and Overheating
Temperature is another important indicator of photovoltaic fuse performance.
Under normal operating conditions, a properly selected and installed PV fuse should operate within its specified temperature limits. Unusually high temperatures around the fuse or fuse holder may indicate an electrical problem.
Common causes of abnormal heating include:
-
Loose electrical connections.
-
Poor contact between the fuse and fuse holder.
-
Excessive operating current.
-
Incorrect fuse specifications.
-
Oxidation or corrosion of contact surfaces.
-
Inadequate heat dissipation.
Overheating can accelerate material ageing, damage insulation, and increase the risk of electrical failure.
During maintenance, technicians can use appropriate infrared temperature measurement equipment or thermal imaging instruments to identify abnormal temperature differences between similar components operating under comparable conditions.
If a photovoltaic fuse or its holder shows abnormal heating, investigate the underlying cause rather than simply replacing the fuse.
Important: Never touch an operating fuse or electrical connection to determine its temperature. Use suitable non-contact measurement equipment.
3. Inspect the Fuse Connections for Looseness
Loose electrical connections are a common cause of overheating and premature photovoltaic fuse failure.
Solar power systems are exposed to daily temperature fluctuations, vibration, and environmental conditions. Over time, these factors may affect the mechanical stability of electrical connections.
A loose connection can increase contact resistance, resulting in excessive heat generation.
The following conditions may indicate a connection problem:
-
The fuse is not securely seated in its holder.
-
Terminal connections show signs of movement.
-
Contact surfaces are oxidised or corroded.
-
The fuse holder shows signs of heat damage.
-
Electrical connections have visible deformation.
A qualified technician should inspect the connection condition after following the appropriate system isolation procedures.
If tightening is required, use the specified torque values and suitable tools. Excessive tightening should be avoided because it may damage the fuse terminals or holder.
Regular connection inspections help maintain stable electrical contact and reduce the risk of unexpected photovoltaic fuse failures.
4. Look for Signs of Overload and Electrical Arcing
Overcurrent and electrical arcing are two important causes of photovoltaic fuse abnormalities.
A photovoltaic fuse is designed to interrupt excessive current when an electrical fault occurs. However, repeated overloads, short circuits, or poor connections can also cause visible damage to the fuse and surrounding components.
Look for the following warning signs:
-
Black or darkened areas on the fuse body.
-
Burn marks around electrical terminals.
-
Melted or deformed insulating materials.
-
Discolouration of metal contacts.
-
Evidence of electrical sparks or arcing.
-
Damaged or melted fuse holders.
These signs may indicate excessive electrical stress or an abnormal connection.
It is important to identify the original cause before installing a replacement fuse. Possible problems include damaged solar modules, defective cables, short circuits, incorrect fuse selection, or loose connections.
Simply replacing a damaged fuse without investigating the underlying fault may result in another failure.
5. Test Photovoltaic Fuse Continuity with a Multimeter
Visual inspection alone cannot always determine whether a photovoltaic fuse is functioning correctly.
A continuity test using a suitable digital multimeter is a more reliable method of checking whether the fuse element is intact.
A typical inspection procedure includes:
Step 1: Isolate the PV System
Follow the manufacturer's shutdown and isolation procedures. Apply appropriate lockout/tagout measures to prevent accidental reconnection.
Remember that solar modules can continue generating DC voltage whenever exposed to light. Switching off the inverter does not necessarily make the entire PV circuit safe.
Step 2: Verify the Absence of Voltage and Current
A qualified technician should use appropriately rated test equipment to verify the electrical condition of the circuit before accessing the fuse.
Never remove or test a photovoltaic fuse while it is energised.
Step 3: Remove the Fuse Safely
Once the circuit has been verified as safe, remove the fuse using an appropriate fuse extraction tool.
Testing the fuse outside its holder helps prevent parallel electrical paths from affecting the measurement.
Step 4: Set the Multimeter to Continuity Mode
Select the continuity testing function on the digital multimeter.
Place one test probe against each metal terminal of the fuse.
Step 5: Interpret the Measurement
The results generally indicate the following:
-
Continuous beep: The fuse element is electrically continuous.
-
No beep or open-circuit reading: The fuse element may have blown.
-
Unstable or unusually high resistance: Further inspection is necessary to determine whether the fuse or testing equipment is faulty.
A healthy fuse should generally have very low electrical resistance.
Always consider the multimeter manufacturer's instructions and the specific fuse design when interpreting measurements.
6. Check Whether the Fuse Is Operating Within Its Rated Specifications
Incorrect fuse selection can cause serious problems in photovoltaic systems.
A fuse may appear physically normal but still be unsuitable for the electrical circuit in which it is installed.
Several important specifications should be checked:
Rated Voltage
The fuse's rated DC voltage must be suitable for the maximum possible system voltage. Photovoltaic systems may operate at high DC voltages, making correct voltage selection particularly important.
Rated Current
The rated current must be appropriate for the circuit's operating conditions and the applicable PV system design requirements.
An incorrectly selected current rating may result in nuisance operation or inadequate protection.
Breaking Capacity
The fuse must have sufficient DC breaking capacity to safely interrupt the prospective fault current under the specified operating conditions.
Fuse Type and Application
Photovoltaic circuits require appropriately designed DC-rated protective devices. An unsuitable fuse may not safely interrupt the electrical current generated during a fault.
Physical Dimensions and Compatibility
The fuse dimensions, terminal design, and holder compatibility should match the installed electrical equipment.
Always compare the fuse specifications with the system design documentation and equipment requirements. Never assume that the rating of an existing fuse is correct simply because it was previously installed.
7. Monitor Solar System Performance for Abnormal Changes
Sometimes, a photovoltaic fuse problem can be identified through changes in overall solar system performance.
A damaged or blown string fuse may interrupt the current flow from one or more solar panel strings, reducing the total electricity generated by the system.
Common performance-related warning signs include:
-
Unexpected reductions in solar power generation.
-
One PV string producing significantly less current than comparable strings.
-
Abnormal inverter alarms or fault indications.
-
Unusual differences between string operating currents.
-
Intermittent power generation.
-
Unexpected interruptions in solar system operation.
If a particular string produces little or no current, a blown fuse may be one possible cause. However, damaged cables, loose connectors, module faults, shading, and inverter problems can produce similar symptoms.
Technicians should compare string current and voltage measurements under comparable operating conditions to identify the source of the problem.
Combining electrical measurements with visual inspections can help determine whether a photovoltaic fuse is responsible for the performance issue.
Common Causes of Photovoltaic Fuse Abnormalities
Understanding why photovoltaic fuses become abnormal is just as important as knowing how to inspect them.
The following table summarises several common causes and their potential consequences.
| Common Cause | Possible Warning Signs | Potential Consequences |
|---|---|---|
| Electrical overload | Blown fuse or excessive heating | Circuit interruption |
| Short circuit | Fuse operation or burn marks | Electrical damage |
| Loose connections | High temperature or unstable contact | Overheating and arcing |
| Corrosion | Oxidised terminals | Increased contact resistance |
| Incorrect fuse rating | Repeated fuse failures | Inadequate circuit protection |
| Poor installation | Loose terminals or damaged holders | Unreliable operation |
| Environmental exposure | Moisture or physical deterioration | Insulation and contact problems |
Identifying these causes during routine maintenance can help reduce unexpected equipment failures and improve the long-term reliability of solar power systems.
How Often Should Photovoltaic Fuses Be Inspected?
Regular inspection is essential for maintaining photovoltaic fuse performance.
The appropriate inspection frequency depends on the installation environment, system design, operating conditions, and manufacturer's maintenance recommendations.
The following maintenance schedule can serve as a general reference:
Routine Visual Inspection
Check accessible fuse assemblies for visible damage, corrosion, discolouration, and other abnormalities during scheduled PV system inspections.
Temperature Inspection
Use suitable temperature measurement equipment to identify abnormal heating, particularly around fuse holders and electrical connections.
Electrical Performance Monitoring
Monitor PV string currents, system voltage, and inverter fault records to identify unexpected changes in system operation.
Periodic Electrical Testing
Qualified technicians should perform continuity and other electrical tests when required by the maintenance plan or when abnormal operating conditions are detected.
For installations operating in harsh environments, such as areas with high humidity, dust, salt exposure, or significant temperature fluctuations, more frequent inspections may be necessary.
Safety Precautions When Inspecting Photovoltaic Fuses
Photovoltaic systems operate with DC electricity, which presents specific electrical hazards. Unlike AC systems, DC arcs can be difficult to extinguish once established.
Therefore, safety must always be the first priority when inspecting or replacing photovoltaic fuses.
Follow these precautions:
-
Always follow the approved PV system shutdown and isolation procedures.
-
Never remove or replace a fuse while current is flowing.
-
Verify the absence of hazardous voltage using appropriately rated test equipment.
-
Apply lockout/tagout procedures to prevent accidental energisation.
-
Wear suitable personal protective equipment.
-
Avoid working on outdoor electrical equipment in wet or rainy conditions.
-
Use appropriate tools designed for electrical maintenance.
-
Never reuse a fuse that shows signs of physical or thermal damage.
-
Investigate the original cause of fuse failure before installing a replacement.
-
Ensure that replacement fuses meet the required electrical and mechanical specifications.
Only qualified personnel with appropriate training and equipment should perform electrical testing, fuse removal, and replacement.
Conclusion
Checking whether photovoltaic fuses are abnormal is an important part of solar power system maintenance.
Physical damage, abnormal temperature, loose connections, burn marks, electrical arcing, continuity problems, incorrect fuse specifications, and unexpected changes in PV string performance are all important warning signs.
By combining regular visual inspections with appropriate electrical testing and system performance monitoring, technicians can identify potential fuse problems before they develop into more serious failures.
Most importantly, any abnormal photovoltaic fuse should be investigated carefully to determine the underlying cause. Selecting the correct replacement fuse and ensuring proper installation are essential for maintaining electrical safety, reliable operation, and long-term solar system performance.
Frequently Asked Questions (FAQs)
1. How can I tell if a photovoltaic fuse is blown?
A blown photovoltaic fuse may show visible signs such as a damaged fuse element, darkened housing, or burn marks. However, some blown fuses have no obvious external damage. A continuity test using a suitable multimeter, performed after proper electrical isolation, can help confirm whether the fuse element is intact.
2. What causes photovoltaic fuses to fail?
Common causes include electrical overloads, short circuits, incorrect fuse ratings, loose connections, poor installation, corrosion, and excessive operating temperatures.
3. Can a photovoltaic fuse become abnormal without blowing?
Yes. A photovoltaic fuse or its associated connection may develop corrosion, physical damage, or abnormal heating without immediately interrupting the circuit. These conditions should be investigated because they can eventually lead to fuse failure or other electrical hazards.
4. Why does a photovoltaic fuse overheat?
Overheating is commonly associated with loose connections, poor contact between the fuse and holder, excessive current, incorrect component selection, or damaged contact surfaces.
5. Can I replace a blown photovoltaic fuse with a fuse of a higher current rating?
No. Installing a fuse with a higher current rating without verifying the system design can compromise circuit protection and create serious safety risks. Replacement fuses must meet the specified electrical, mechanical, and application requirements.
6. How do I test a photovoltaic fuse with a multimeter?
After the circuit has been properly isolated and verified as safe, remove the fuse using an appropriate tool. Set the multimeter to continuity mode and place one probe on each fuse terminal. A continuous reading generally indicates that the fuse element is intact, while an open-circuit reading indicates a potentially blown fuse.
7. Why is regular photovoltaic fuse inspection important?
Regular inspections help identify physical deterioration, loose connections, overheating, corrosion, and electrical faults. Early detection can prevent unexpected system interruptions, reduce maintenance costs, and improve the safety and reliability of photovoltaic installations.